Build a User Management App with Refine
This tutorial demonstrates how to build a basic user management app. The app authenticates and identifies the user, stores their profile information in the database, and allows the user to log in, update their profile details, and upload a profile photo. The app uses:
- Supabase Database - a Postgres database for storing your user data and Row Level Security so data is protected and users can only access their own information.
- Supabase Auth - allow users to sign up and log in.
- Supabase Storage - allow users to upload a profile photo.
If you get stuck while working through this guide, refer to the full example on GitHub.
About Refine#
Refine is a React-based framework used to rapidly build data-heavy applications like admin panels, dashboards, storefronts and any type of CRUD apps. It separates app concerns into individual layers, each backed by a React context and respective provider object. For example, the auth layer represents a context served by a specific set of authProvider methods that carry out authentication and authorization actions such as logging in, logging out, getting roles data, etc. Similarly, the data layer offers another level of abstraction equipped with dataProvider methods to handle CRUD operations at appropriate backend API endpoints.
Refine provides hassle-free integration with a Supabase backend with its supplementary @refinedev/supabase package. It generates authProvider and dataProvider methods at project initialization, so you don't need to spend much effort defining them yourself, choose Supabase as the backend service while creating the app with create refine-app.
Project setup#
Before you start building you need to set up the Database and API. You can do this by starting a new Project in Supabase and then creating a "schema" inside the database.
Create a project#
- Create a new project in the Supabase Dashboard.
- Enter your project details.
- Wait for the new database to launch.
Set up the database schema#
Now set up the database schema. You can use the "User Management Starter" quickstart in the SQL Editor, or you can copy/paste the SQL from below and run it.
- Go to the SQL Editor page in the Dashboard.
- Click User Management Starter under the Community > Quickstarts tab.
- Click Run.
You can pull the database schema down to your local project by running the db pull command. Read the local development docs for detailed instructions.
1supabase link --project-ref <project-id>2# You can get <project-id> from your project's dashboard URL: https://supabase.com/dashboard/project/<project-id>3supabase db pullGet API details#
Now that you've created some database tables, you are ready to insert data using the auto-generated API.
To do this, you need to get the Project URL and key from the project Connect dialog.
Changes to API keys
Supabase is changing the way keys work to improve project security and developer experience. You can read the full announcement, but in the transition period, you can use both the current anon and service_role keys and the new publishable key with the form sb_publishable_xxx which will replace the older keys.
In most cases, you can get the correct key from the Project's Connect dialog, but if you want a specific key, you can find all keys in the API Keys section of a Project's Settings page:
- For legacy keys, copy the
anonkey for client-side operations and theservice_rolekey for server-side operations from the Legacy API Keys tab. - For new keys, open the API Keys tab, if you don't have a publishable key already, click Create new API Keys, and copy the value from the Publishable key section.
Read the API keys docs for a full explanation of all key types and their uses.
Building the app#
Start building the Refine app from scratch.
Initialize a Refine app#
Use create refine-app command to initialize an app. Run the following in the terminal:
1npm create refine-app@latest -- --preset refine-supabaseThe command above uses the refine-supabase preset which chooses the Supabase supplementary package for the app. There's no UI framework, so the app has a headless UI with plain React and CSS styling.
The refine-supabase preset installs the @refinedev/supabase package which out-of-the-box includes the Supabase dependency: supabase-js.
Install the @refinedev/react-hook-form and react-hook-form packages that to use React Hook Form inside Refine apps. Run:
1npm install @refinedev/react-hook-form react-hook-formRefine supabaseClient#
The create refine-app generated a Supabase client in the src/utility/supabaseClient.ts file. It has two constants: SUPABASE_URL and SUPABASE_KEY. Replace them as supabaseUrl and supabasePublishableKey respectively and assign them your Supabase server's values.
Update it with environment variables managed by Vite:
src/utility/supabaseClient.ts
1import { createClient } from "@refinedev/supabase";23const supabaseUrl = import.meta.env.VITE_SUPABASE_URL;4const supabaseKey = import.meta.env.VITE_SUPABASE_PUBLISHABLE_KEY;56export const supabaseClient = createClient(supabaseUrl, supabaseKey, {7 db: {8 schema: "public",9 },10 auth: {11 persistSession: true,12 },13});Save the environment variables in a .env.local file. All you need are the API URL and the key that you copied earlier.
1VITE_SUPABASE_URL=YOUR_SUPABASE_URL2VITE_SUPABASE_PUBLISHABLE_KEY=YOUR_SUPABASE_PUBLISHABLE_KEYThe supabaseClient fetches calls to Supabase endpoints from the app. The client is instrumental in implementing authentication using Refine's auth provider methods and CRUD actions with appropriate data provider methods.
One optional step is to update the CSS file src/App.css to make the app look nice.
You can find the full contents of this file here.
In order to add login and user profile pages in this App, tweak the <Refine /> component inside App.tsx.
The <Refine /> component#
The App.tsx file initially looks like this:
1import { Refine, WelcomePage } from '@refinedev/core'2import { RefineKbar, RefineKbarProvider } from '@refinedev/kbar'3import routerProvider, {4 DocumentTitleHandler,5 UnsavedChangesNotifier,6} from '@refinedev/react-router'7import { dataProvider, liveProvider } from '@refinedev/supabase'8import { BrowserRouter, Route, Routes } from 'react-router'9import './App.css'10import authProvider from './authProvider'11import { supabaseClient } from './utility'1213function App() {14 return (15 <BrowserRouter>16 <RefineKbarProvider>17 <Refine18 dataProvider={dataProvider(supabaseClient)}19 liveProvider={liveProvider(supabaseClient)}20 authProvider={authProvider}21 routerProvider={routerProvider}22 options={{23 syncWithLocation: true,24 warnWhenUnsavedChanges: true,25 }}26 >27 <Routes>28 <Route index element={<WelcomePage />} />29 </Routes>30 <RefineKbar />31 <UnsavedChangesNotifier />32 <DocumentTitleHandler />33 </Refine>34 </RefineKbarProvider>35 </BrowserRouter>36 )37}3839export default AppFocus on the <Refine /> component, which comes with props passed to it. Notice the dataProvider prop. It uses a dataProvider() function with supabaseClient passed as argument to generate the data provider object. The authProvider object also uses supabaseClient in implementing its methods. You can look it up in src/authProvider.ts file.
Customize authProvider#
If you examine the authProvider object you can notice that it has a login method that implements an OAuth and Email / Password strategy for authentication. This tutorial instead removes them and use Magic Links to allow users sign in with their email without using passwords.
Use supabaseClient auth's signInWithOtp method inside authProvider.login method:
src/authProvider.ts
1login: async ({ email }) => {2 try {3 const { error } = await supabaseClient.auth.signInWithOtp({ email });45 if (!error) {6 alert("Check your email for the login link!");7 return {8 success: true,9 };10 };1112 throw error;13 } catch (e: any) {14 alert(e.message);15 return {16 success: false,17 e,18 };19 }20},Remove register, updatePassword, forgotPassword and getPermissions properties, which are optional type members and also not necessary for the app. The final authProvider object looks like this:
src/authProvider.ts
1import { AuthProvider } from "@refinedev/core";23import { supabaseClient } from "./utility";45const authProvider: AuthProvider = {6 login: async ({ email }) => {7 try {8 const { error } = await supabaseClient.auth.signInWithOtp({ email });910 if (!error) {11 alert("Check your email for the login link!");12 return {13 success: true,14 };15 }1617 throw error;18 } catch (e: any) {19 alert(e.message);20 return {21 success: false,22 e,23 };24 }25 },26 logout: async () => {27 const { error } = await supabaseClient.auth.signOut();2829 if (error) {30 return {31 success: false,32 error,33 };34 }3536 return {37 success: true,38 redirectTo: "/",39 };40 },41 onError: async (error) => {42 console.error(error);43 return { error };44 },45 check: async () => {46 try {47 const { data, error } = await supabaseClient.auth.getClaims();4849 if (error || !data) {50 return {51 authenticated: false,52 error: {53 message: "Check failed",54 name: "Session not found",55 },56 logout: true,57 redirectTo: "/login",58 };59 }60 } catch (error: any) {61 return {62 authenticated: false,63 error: error || {64 message: "Check failed",65 name: "Not authenticated",66 },67 logout: true,68 redirectTo: "/login",69 };70 }7172 return {73 authenticated: true,74 };75 },76 getIdentity: async () => {77 const { data } = await supabaseClient.auth.getUser();7879 if (data?.user) {80 return {81 ...data.user,82 name: data.user.email,83 };84 }8586 return null;87 },88};8990export default authProvider;Set up a login component#
As the app uses the headless Refine core package that comes with no supported UI framework set up a plain React component to manage logins and sign ups.
Create and edit src/components/auth.tsx:
src/components/auth.tsx
1import { useState } from "react";23import { useLogin } from "@refinedev/core";45export default function Auth() {6 const [email, setEmail] = useState("");7 const { isPending, mutate: login } = useLogin();89 const handleLogin = async (event: { preventDefault: () => void }) => {10 event.preventDefault();11 login({ email });12 };1314 return (15 <div className="row flex flex-center container">16 <div className="col-6 form-widget">17 <h1 className="header">Supabase + Refine</h1>18 <p className="description">19 Sign in via magic link with your email below20 </p>21 <form className="form-widget" onSubmit={handleLogin}>22 <div>23 <input24 className="inputField"25 type="email"26 placeholder="Your email"27 value={email}28 required={true}29 onChange={(e) => setEmail(e.target.value)}30 />31 </div>32 <div>33 <button className={"button block"} disabled={isPending}>34 {isPending ? <span>Loading</span> : <span>Send magic link</span>}35 </button>36 </div>37 </form>38 </div>39 </div>40 );41}The useLogin() Refine auth hook to grab the mutate: login method to use inside handleLogin() function and isLoading state for the form submission. The useLogin() hook conveniently offers access to authProvider.login method for authenticating the user with OTP.
Account page#
After a user is signed in, allow them to edit their profile details and manage their account.
Create a new component for that in src/components/account.tsx.
src/components/account.tsx
1import { BaseKey, useGetIdentity, useLogout } from "@refinedev/core";23import { useForm } from "@refinedev/react-hook-form";45// ...67interface IUserIdentity {8 id?: BaseKey;9 username: string;10 name: string;11}1213export interface IProfile {14 id?: string;15 username?: string;16 website?: string;17 avatar_url?: string;18}1920export default function Account() {21 const { data: userIdentity } = useGetIdentity<IUserIdentity>();2223 const { mutate: logOut } = useLogout();2425 const {26 refineCore: { formLoading, query, onFinish },27 register,28 control,29 handleSubmit,30 } = useForm<IProfile>({31 refineCoreProps: {32 resource: "profiles",33 action: "edit",34 id: userIdentity?.id,35 redirect: false,36 onMutationError: (data) => alert(data?.message),37 },38 });3940 return (41 <div className="container" style={{ padding: "50px 0 100px 0" }}>42 <form onSubmit={handleSubmit(onFinish)} className="form-widget">4344 {/* ... */}4546 <div>47 <label htmlFor="email">Email</label>48 <input49 id="email"50 name="email"51 type="text"52 value={userIdentity?.name}53 disabled54 />55 </div>56 <div>57 <label htmlFor="username">Name</label>58 <input id="username" type="text" {...register("username")} />59 </div>60 <div>61 <label htmlFor="website">Website</label>62 <input id="website" type="url" {...register("website")} />63 </div>6465 <div>66 <button67 className="button block primary"68 type="submit"69 disabled={formLoading}70 >71 {formLoading ? "Loading ..." : "Update"}72 </button>73 </div>7475 <div>76 <button77 className="button block"78 type="button"79 onClick={() => logOut()}80 >81 Sign Out82 </button>83 </div>84 </form>85 </div>86 );87}This uses three Refine hooks, namely the useGetIdentity(), useLogOut() and useForm() hooks.
useGetIdentity() is a auth hook that gets the identity of the authenticated user. It grabs the current user by invoking the authProvider.getIdentity method under the hood.
useLogOut() is also an auth hook. It calls the authProvider.logout method to end the session.
useForm(), in contrast, is a data hook that exposes a series of useful objects that serve the edit form. For example, grabbing the onFinish function to submit the form with the handleSubmit event handler. It also uses formLoading property to present state changes of the submitted form.
The useForm() hook is a higher-level hook built on top of Refine's useForm() core hook. It fully supports form state management, field validation and submission using React Hook Form. Behind the scenes, it invokes the dataProvider.getOne method to get the user profile data from the Supabase /profiles endpoint and also invokes dataProvider.update method when onFinish() is called.
Launch!#
Now that you have all the components in place, define the routes for the pages in which they should be rendered.
Add the routes for /login with the <Auth /> component and the routes for index path with the <Account /> component. So, the final App.tsx:
src/App.tsx
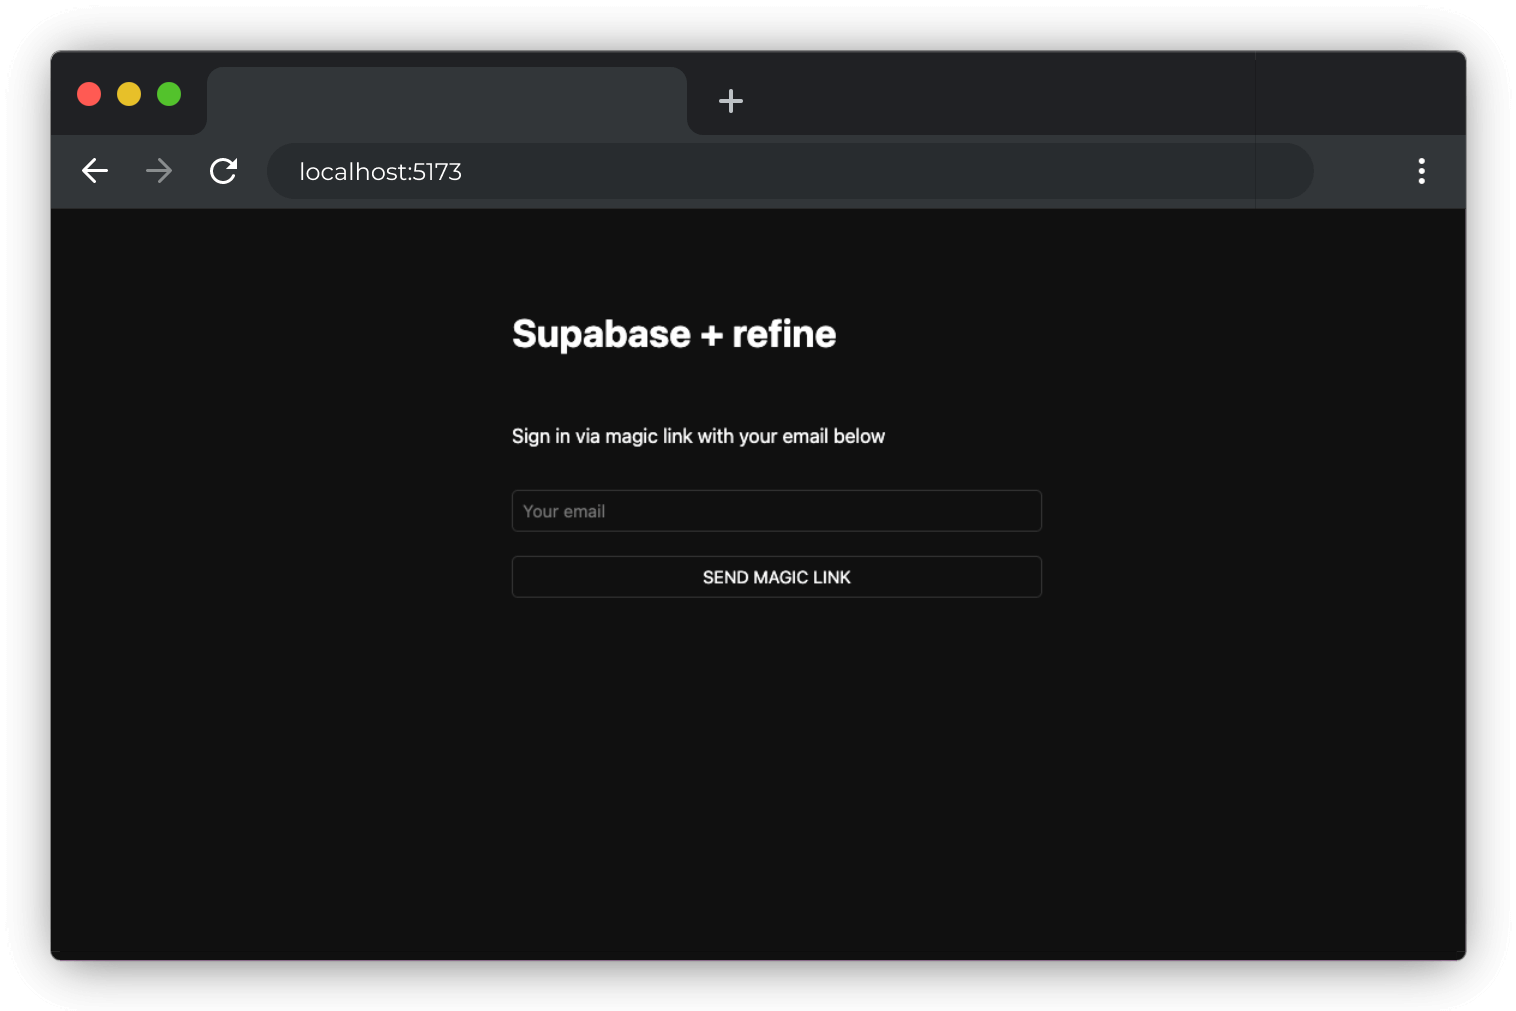
1import { Authenticated, Refine } from "@refinedev/core";2import { RefineKbar, RefineKbarProvider } from "@refinedev/kbar";3import routerProvider, {4 CatchAllNavigate,5 DocumentTitleHandler,6 UnsavedChangesNotifier,7} from "@refinedev/react-router";8import { BrowserRouter, Outlet, Route, Routes } from "react-router";910import { dataProvider, liveProvider } from "@refinedev/supabase";11import authProvider from "./authProvider";12import { supabaseClient } from "./utility";1314import Account from "./components/account";15import Auth from "./components/auth";1617import "./App.css";1819function App() {20 return (21 <BrowserRouter>22 <RefineKbarProvider>23 <Refine24 dataProvider={dataProvider(supabaseClient)}25 liveProvider={liveProvider(supabaseClient)}26 authProvider={authProvider}27 routerProvider={routerProvider}28 options={{29 syncWithLocation: true,30 warnWhenUnsavedChanges: true,31 }}32 >33 <Routes>34 <Route35 element={36 <Authenticated37 key="authenticated-routes"38 fallback={<CatchAllNavigate to="/login" />}39 >40 <Outlet />41 </Authenticated>42 }43 >44 <Route index element={<Account />} />45 </Route>46 <Route47 element={<Authenticated key="auth-pages" fallback={<Outlet />} />}48 >49 <Route path="/login" element={<Auth />} />50 </Route>51 </Routes>52 <RefineKbar />53 <UnsavedChangesNotifier />54 <DocumentTitleHandler />55 </Refine>56 </RefineKbarProvider>57 </BrowserRouter>58 );59}6061export default App;Test the App by running the server again:
1npm run devAnd then open the browser to localhost:5173 and you should see the completed app.
Bonus: Profile photos#
Every Supabase project is configured with Storage for managing large files like photos and videos.
Create an upload widget#
Create an avatar for the user so that they can upload a profile photo. Add a new component:
Create and edit src/components/avatar.tsx:
src/components/avatar.tsx
1import { useEffect, useState } from "react";23import { supabaseClient } from "../utility/supabaseClient";45type TAvatarProps = {6 url?: string;7 size: number;8 onUpload: (filePath: string) => void;9};1011export default function Avatar({ url, size, onUpload }: TAvatarProps) {12 const [avatarUrl, setAvatarUrl] = useState("");13 const [uploading, setUploading] = useState(false);1415 useEffect(() => {16 if (url) downloadImage(url);17 }, [url]);1819 async function downloadImage(path: string) {20 try {21 const { data, error } = await supabaseClient.storage22 .from("avatars")23 .download(path);24 if (error) {25 throw error;26 }27 const url = URL.createObjectURL(data);28 setAvatarUrl(url);29 } catch (error: any) {30 console.log("Error downloading image: ", error?.message);31 }32 }3334 async function uploadAvatar(event: React.ChangeEvent<HTMLInputElement>) {35 try {36 setUploading(true);3738 if (!event.target.files || event.target.files.length === 0) {39 throw new Error("You must select an image to upload.");40 }4142 const file = event.target.files[0];43 const fileExt = file.name.split(".").pop();44 const fileName = `${Math.random()}.${fileExt}`;45 const filePath = `${fileName}`;4647 const { error: uploadError } = await supabaseClient.storage48 .from("avatars")49 .upload(filePath, file);5051 if (uploadError) {52 throw uploadError;53 }54 onUpload(filePath);55 } catch (error: any) {56 alert(error.message);57 } finally {58 setUploading(false);59 }60 }6162 return (63 <div>64 {avatarUrl ? (65 <img66 src={avatarUrl}67 alt="Avatar"68 className="avatar image"69 style={{ height: size, width: size }}70 />71 ) : (72 <div73 className="avatar no-image"74 style={{ height: size, width: size }}75 />76 )}77 <div style={{ width: size }}>78 <label className="button primary block" htmlFor="single">79 {uploading ? "Uploading ..." : "Upload"}80 </label>81 <input82 style={{83 visibility: "hidden",84 position: "absolute",85 }}86 type="file"87 id="single"88 name="avatar_url"89 accept="image/*"90 onChange={uploadAvatar}91 disabled={uploading}92 />93 </div>94 </div>95 );96}Add the new widget#
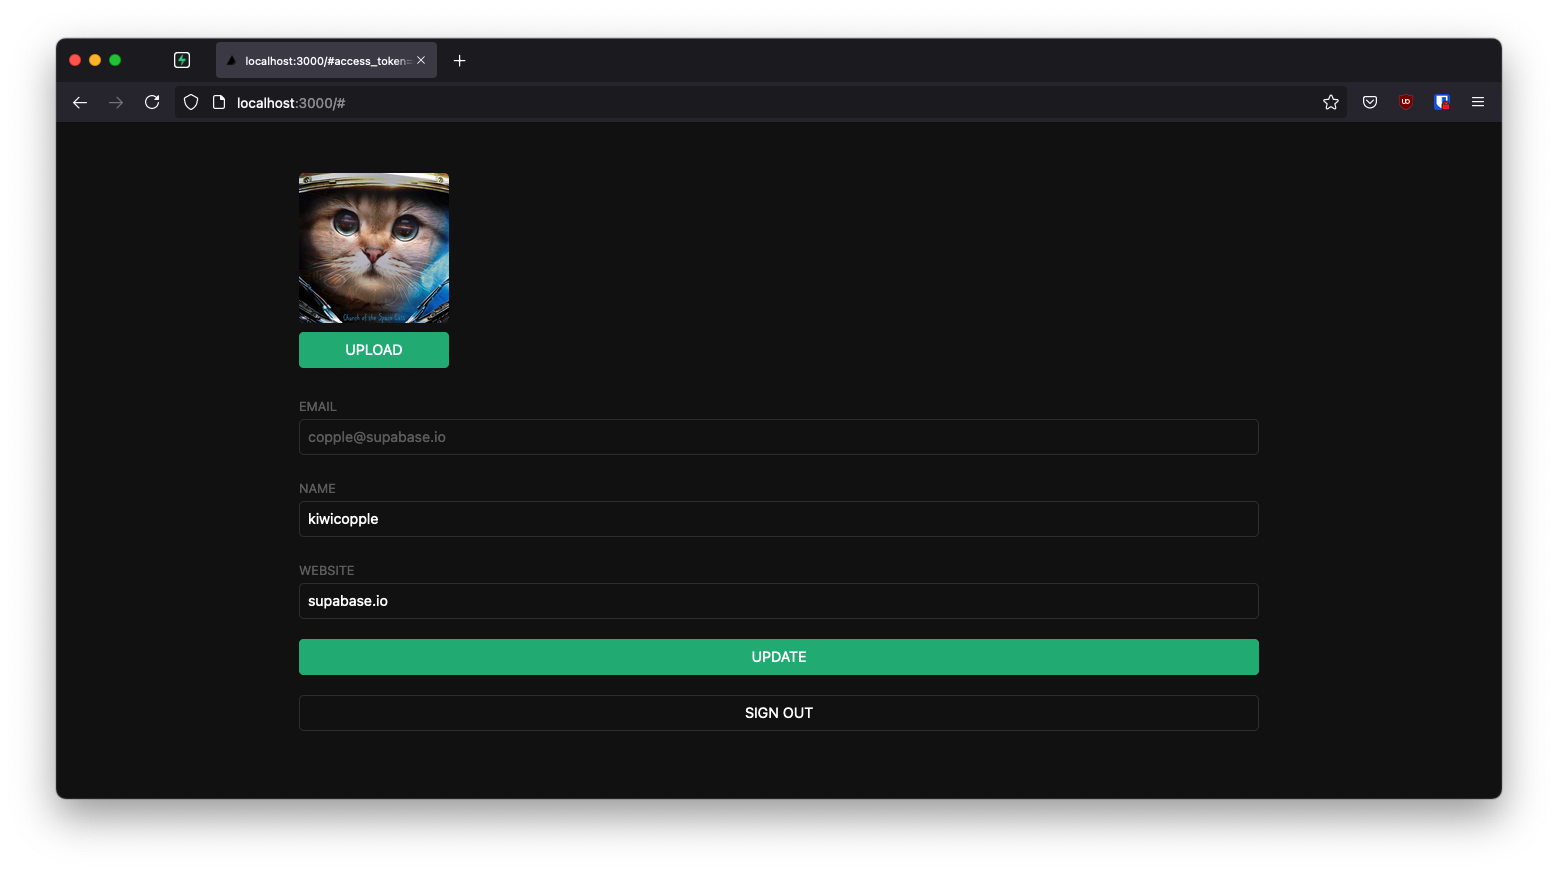
And then add the widget to the Account page at src/components/account.tsx:
src/components/account.tsx
1import { BaseKey, useGetIdentity, useLogout } from "@refinedev/core";23import { useForm } from "@refinedev/react-hook-form";4import { Controller } from "react-hook-form";56import Avatar from "./avatar";78interface IUserIdentity {9 id?: BaseKey;10 username: string;11 name: string;12}1314export interface IProfile {15 id?: string;16 username?: string;17 website?: string;18 avatar_url?: string;19}2021export default function Account() {22 const { data: userIdentity } = useGetIdentity<IUserIdentity>();2324 const { mutate: logOut } = useLogout();2526 const {27 refineCore: { formLoading, query, onFinish },28 register,29 control,30 handleSubmit,31 } = useForm<IProfile>({32 refineCoreProps: {33 resource: "profiles",34 action: "edit",35 id: userIdentity?.id,36 redirect: false,37 onMutationError: (data) => alert(data?.message),38 },39 });4041 return (42 <div className="container" style={{ padding: "50px 0 100px 0" }}>43 <form onSubmit={handleSubmit(onFinish)} className="form-widget">44 <Controller45 control={control}46 name="avatar_url"47 render={({ field }) => {48 return (49 <Avatar50 url={field.value}51 size={150}52 onUpload={(filePath) => {53 onFinish({54 ...query?.data?.data,55 avatar_url: filePath,56 onMutationError: (data: { message: string }) =>57 alert(data?.message),58 });59 field.onChange({60 target: {61 value: filePath,62 },63 });64 }}65 />66 );67 }}68 />69 <div>70 <label htmlFor="email">Email</label>71 <input72 id="email"73 name="email"74 type="text"75 value={userIdentity?.name}76 disabled77 />78 </div>79 <div>80 <label htmlFor="username">Name</label>81 <input id="username" type="text" {...register("username")} />82 </div>83 <div>84 <label htmlFor="website">Website</label>85 <input id="website" type="url" {...register("website")} />86 </div>8788 <div>89 <button90 className="button block primary"91 type="submit"92 disabled={formLoading}93 >94 {formLoading ? "Loading ..." : "Update"}95 </button>96 </div>9798 <div>99 <button100 className="button block"101 type="button"102 onClick={() => logOut()}103 >104 Sign Out105 </button>106 </div>107 </form>108 </div>109 );110}At this stage, you have a fully functional application!